Followers

Showing posts with label makeup tutorial. Show all posts

Tuesday, August 2, 2011

My First Makeup Haul!!!!! XD

Hi everyone! I am so so so sorry that I wasn't able to post this haul up yesterday.  I came home from work yesterday only to find out that the Internet at my house went out. :/ I don't know how long it'll be 'til I get it back but until then I'll just have to be doing my posts at my boyfriend's house.  Anyhow, I know you all have been waiting to see what I bought lately and I can't hold the secret haul anyone. Teehee :) Here is the makeup haul you all have been waiting for!!!

Shatter polish by OPI. Just add one coat of this to your base coat and watch as it "shatters" before your very eyes.  Below I used a white base coat and topped it off with the shatter polish.


Revlon ColorBlast Lipstick in Candy Pink
A very bright, pink color that's perfect for going out to clubs and raves.  Very vibrant color yet the feel of the lipstick is very smooth and creamy.


MAC matte lipstick in Ruby Woo.  This lipstick smells, yes I said smells, and feels creamy.  The color stays on for 24 hours and if you want to add a bit of shine to it, you can top it off with clear lipgloss. :)


 Urban Decay 24/7 Glide On Shadow Pencil in Rehab.  I really like this pencil.  I can just color it on myeyelids, smudge it a bit, and I'm good to go as far as eyeshadow.  It really lasts a long time so I was impressed by this product.


In Natural Light

In Flash

EOS Lipbalm in Honeysuckle.  Soothes and softens lips.  Perfect for primming your lips before applying on lipgloss or lipstick.

Smashbox's Bionic Mascara. This mascara gives max volume to your lashes. I showed my mom my lashes after I applied the mascara on and she thought I was wearing falsies. lol


Ardell Fashion Lashes.  I haven't used these pair yet but I have used a similar pair before and I gotta say they are a really good brand to use.

Sally Hansen Nail Art Pen in Pink.  I will be using this in a future tutorial really soon so you all will be able to see the results.  The pen itself is really cute and doesn't make a mess when drawing on your nails.


Smashbox's O-Gloss
Just apply a little bit on your lips and watch as the gloss goes on from clear to your very own custom shade of pink lipgloss!


And that is the end of my haul.  So has anyone else tried any of these products?  What do you think of them?

Before I go, I just wanted to say that I can't believe that I'm close to having 50 followers on my blog! I'm so estatic! I would love to host a contest right now but I think I'm going to keep waiting until I hit 100 followers for my first contest so be sure to stick around for that. Until next time!


xoxo Sammy

Tuesday, July 5, 2011

Makeup Tutorial: 2NE1's "I Am the Best" Promo Poster Look

Yo!  It's been a while. hehe sorry I've been offline for the past couple of weeks but I have an excuse.  Ready? Can I get a drumroll please? I finally got a job!!!! Yipeee! lol Yep that's right I finally got a job for the summer as administrative assistant for a company.  Even though I will be working over the summer, I'm going to try really hard to post up new looks, OOTDs especially for work, and reviews on new products that I will be purchasing soon but for now here is another new look that you all can try. :)


2NE1 just recently released their new single, "I Am the Best" as well as the mv to it on YouTube.  Before the debut of the mv, they had been teasing their fans on their YouTube channel with the promo poster and audio clips for the single.  So while I was anxiously waiting for the single to come out, I thought it'd be awesome to recreate their cartoon promo poster look instead.

While I am still listening to this song over and over again (to the point that it's stuck in my head), the poster itself is very eye-catching and reminds me of the powerpuff girls.  It's cute yet mischievous and fierce at the same time.


Products Used in this Tutorial:
Clinique concealer in 05 Medium Beige
bare Minerals foundation powder in Summer Bisque
bare Minerals Mineral Veil
Ulta eyeshadow kit (teal, matte blue, navy blue, and black)
Smashbox Lash DNA mascara
Ulta gel eyeliner in black

Victoria's Secret Blush in In Lust
Victoria's Secret lipstick in Kiss Me

Start off with a clean and moisturized face.  Fill in the brows with an eyebrow pencil or powder since they will be framing your whole face at the end of this tutorial. Take your favorite concealer and apply it under your eyes as well as around the nose and corners of your mouth to cover up dark spots and shadows.  Set your face ready for makeup by applying on foundation for even coverage and a clear canvas.

Next take a matte blue eyeshadow and apply all over your lids.  This will be a base color for the lighter and darker shades of blue.  With a teal blue color, apply to the inner corners of your eyes and blend it out.  Now with a navy blue color, apply to the outer V as well as the crease of your eyes and gently blend it out to create a smokey effect.  Now with a black eyeshadow, lay it over the navy blue to intensify the look.  Line your upper lashline with either a black gel eyeliner or liquid eyeliner and about 3/4's of your lower lashline with a black eyeliner pencil. To make the look bolder and more dramatic, take a Q-tip and load it up with the navy blue and black eyeshadows and line the lower lashline. Be sure to connect the eyeliners together to make the look complete.  Add false lashes before curling and coating your lashes with mascara.

Curl your lashes and coat them with your favorite volumizing mascara.  Finally apply a pink blush to the apples of your cheeks and fill in your lips with a pink lipstick and you're done! :)

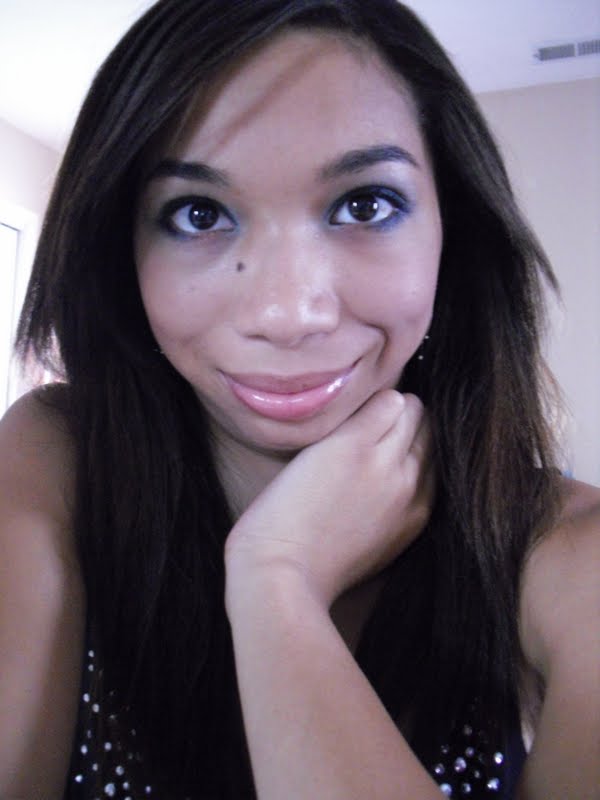
And here is the final look:


A look that's perfect for a night to the club or a party.  Your eyes will look very dramatic and bold in these shades of blue.  I hope you all will enjoy this look. :) Until next time!

XOXO Sammy <3

Thursday, June 9, 2011

Contest Entry and FOTD: Summer Sunflower Tutorial

Good afternoon everyone! Today's tutorial is a bit different from my normal tutorials.  DSK's Steph is holding a contest where you create a detailed FOTD.  I thought it'd be pretty neat to enter so here is my entry for the contest.

For my look, I was inspired by the song Angels by Hope (if you have ever played Sims 2 Castaways they play the song there in Simish language) as well as the beauty of sunflowers.  I really wanted to keep the look soft and feminine but still show the beautiful radiance of a sunflower in my makeup.


Products Used in this Tutorial:
Clinique concealer in 05 Medium Beige
bare Minerals foundation powder in Summer Bisque
bare Minerals Mineral Veil
Smashbox Brow Tech & Cream Eye Liner Palette
Ulta eyeshadow kit (gold and matte brown)
Victoria's Secret Beauty Rush eyeshadow in Money Baby
Smashbox Lash DNA mascara
Ulta bronzer in Afterglow
Sephora's lipgloss in Aztec Gold

Starting off with a clean and moisturized face, apply a yellow toned concealer to hide dark spots and shadows around the eyes, nose, and mouth.  Use foundation to blend the concealer and to set your face ready for makeup. Be sure to fill in your brows with an eyebrow pencil or powder since they will be framing your face.

Take a matte brown eyeshadow and apply to the inner corners of your eyes.  Next, take a gold eyeshadow and apply to the middle of your eyes and gently blend it in with the brown eyeshadow.  Now with a bright green eyeshadow, apply to the outer corners of your eyes by tracing the outer V.  This will make your eyes look like they are surronded by leaves.  Very lightly blend the green eyeshadow a bit to mesh well with the rest of your eyes.

Now with an eyeliner brush loaded with brown gel eyeliner, line the upper lash lines.  Curl your lashes and apply on mascara.  I didn't have any brown mascara so I opted for black instead.  I wanted to go for a glowy complexion, so with your favorite bronzer apply to the apples of your cheeks and gradually build up the color to your desire.  Finally take a lipgloss with a golden tone to it and apply to your lips.  Now you're finished. :)
Here is the final look:


These feathers came from my masquerade mask and I couldn't bear to throw them away since they were such a pretty green color so I decided to be creative and stick them in my hair. :)


Questions for the Contest:
1.) I originally found your jewelry blog through one of Bubzbeauty's videos a year or two ago.  Your beauty blog on the other hand I saw on your jewelry blog :)
2.) I currently do not own any Sigma brushes
3.) I absolutely love my Smashbox Lash DNA mascara.  It really gives my eyes more volume for a more dramatic look. :)

For those who still want to enter, the deadline is June 10th Seattle time but I encourage you all to be creative and unique :) I hope you all enjoy wearing this look throughout the summer.

Good luck! <3 Sammy

Friday, April 29, 2011

2NE1's Sandara "CAN'T NOBODY" Look

Hello everyone! TGIF!!! lol Hope you all are having a great week if not there's always the weekend.  Finals start next week so for those who are in college like myself, I wish you luck :)  So here is a new tutorial featuring the ever so lovely Sandara Park from 2NE1.


I posted the music video below the photos.  Sandara's makeup in the MV is so vibrant and gorgeous and it's great for going to clubs and parties.  I'll admit it was a bit difficult to recreate this look due to the different shades of purple and hints of hot pink but once you finish this look I swear to you that it's worth the trouble.


Products Used in This Tutorial:
Clinique concealer in 05 Medium Beige
bare Minerals foundation powder in Summer Bisque
bare Minerals Mineral Veil powder
Smashbox Brow Tech & Cream Eye Liner Palette
Ulta eyeshadow kit (matte purple, shimmering lilac, shimmering white, hot pink)
Victoria's Secret eyeshadow in Blindlight
Sephora's eyeliner pencil in White
Ulta gel eyeliner in Black
Smashbox Lash DNA mascara
Ulta blush in Pretty in Pink
Victoria's Secret lipstick in Kiss Me
 
So as always start off with a freshly cleansed and moisturized face.  Cover up any dark spots or shadows under the eyes and around the mouth and nose with a yellow toned concealer to cancel out the purple hues.  Be sure to define your eyebrows with an eyebrow pencil or powder.  Take a liquid foundation or powdered foundation and apply/dust it on your face with a kabuki brush.  Use a translucent powder to finish prepping your face.

Now take a matte purple eyeshadow and cover your entire eyelid with the color.  This is going to serve as a base for the rest of the colors we're using.  Take a lilac eyeshadow and apply towards the middle of your eye.  For this step, I used Victoria's Secret eyeshadow in Blindlight.  Now take a shimering lilac color and apply it over the first lilace color.  Take a dark purple and apply it over the rest of the matte purple.  In the inner corners of your eyes, take a hot pink eyeshadow and apply it here then lightly blend it in so the colors transition together.  Now the easy part: the white lines pattern.  Take a white eyeshadow and draw small lines on you eyes.  If you need to, you can practice drawing them on the back of your hand.  Take a white eyeshadow and lightly dab it onto each line to make the white stand out. You can also apply white eyeshadow to your brow bone to define your brows as well.

Take a black gel eyeliner and line your eyes, winging them out a bit at the ends.  Curl your lashes and apply on a volumous mascara.  If you want, you can apply on falsh lashes for a dramatic effect.  With a pink blush, apply it to the apples of your cheeks.  Finally, take a pink lipstick and apply to your lips.  Now you're finished. :)

So here is the final look:


Wardrobe Used in This Tutorial:
Hoodie from Walmart
Shorts from Forever 21
Shoes from Lady's Footlocker

Since I didn't have any cloth that was like in the MV, I got creative and made a Hip-Hop outfit instead.  It was actaully pretty fun doing the shoot for this tutorial since I got to play around with this outfit (though I would never actually wear it out in public :P)

It's a very beautiful look and goes well with any eye color especially brown eyed girls.  I hope you all have fun with this look.  Good luck!
Related Posts Plugin for WordPress, Blogger...