Followers

Wednesday, January 26, 2011

Namie Amuro Inspired Break It Makeup Tutorial

Hello everyone!  Here is another makeup tutorial for all of those who love bright, glittery, and punked out colors.  This look was inspired by the song Break It from Namie Amuro's 35th single Break It/Get Myself Back.  The colors actually came from the background of her single:


I actually listened to a remix of Namie's song I found on Youtube.  Really set the mood while I played around with my makeup.  Here is the link below in case you all wanted to hear it.


Tools used for this look:
Clinique concealer in 05 Medium Beige
bare Minerals foundation powder in Summer Bisque
Smashbox Brow Tech & Cream Eye Liner Palette
Ulta Eyeshadow Kit (Hot Pink, Plum, Bright Silver, and Glitter Black)
Ulta liquid eye liner in Black
Smashbox Lash DNA mascara
Victoria’s Secret Mosaic Blush in In Lust
Victoria's Secret Lipstick in Kiss Me
Forever 21 glitter lip gloss in pearl pink

As always, you want to start off with a clean and moisturized face.  Use concealer to hide dark circles and dark spots on your face then use a foundation powder to set the concealer.
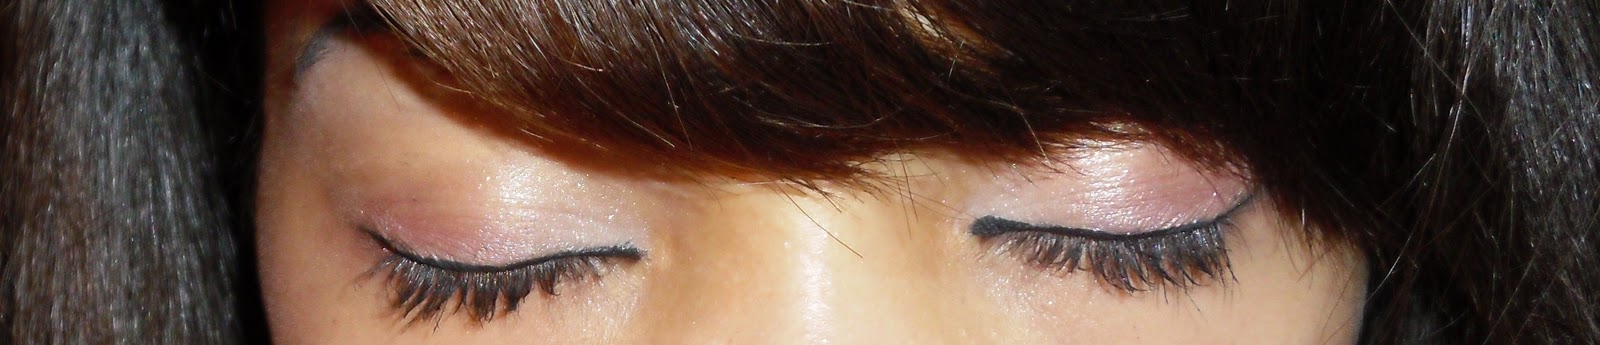
Using an eyebrow pencil 2-3 shades lighter than your natural hair color,  fill in your brows. Now use a bright shimmering silver eyeshadow and apply to the inner corners of your eyes.  Afterwards, use a hot pink eyeshadow and apply to the middle of your eyes.  Afterwards use a plum eyeshadow and apply to the outer V (aka the outer corners) of your eyes.  Blend the colors together to remove any harsh lines.  Now take a glittery black eyeshadow and line the outer corners of your eyes (1/3 to be exact).  Lightly soften the color with a blending brush.
Now take your eyeliner brush and using a black gel eyeliner, line the upper lip of your eye.  This is optional: if you are going to a club or a party and you want your eyes to be more dramatic, line 2/3s of the bottom lid of your eyes with a black eyeliner pencil.  Softly blend the color out to make it smokey.  Then line the top lid of your eyes with the eyeliner pencil and blend the color out.  Once finished, curl your lashes and apply your favorite mascara. You can also use falsh eyelashes in case you need that extra umph. :)  I would recommend using the Ardell Fashion Lashes Starter Kit for this part.
Time to focus on the rest of your face.  Take a light rosy pink blush and apply to the apples of your cheeks.  For your lips, use a pink lipstick (preferably one with a bit of glitter) and apply to your lips.  Use a pink lip gloss with a pinch of glitter in it for the finishing touch.

And here is the finished look:


I also created an outfit of the day just to go with this look.  I think it suits the makeup very well.  :)  What do you guys think?


Clothes Used in this Look:
Pleather jacket from Forever 21 (size small)
Tube top from Wet Seal (size small)
Black skinny jeans from Forever 21 (size small)
Laced up ankle boots from Rainbow (size 7)

I really hope you all enjoyed this look.  I'll definitely be posting up more tips and tricks for you real soon.  Stay tuned for the next post folks! <3

Saturday, January 15, 2011

Strawberry Champagne Eyes

Good evening everyone!  So here is my first makeup tutorial: Strawberry Champagne Eyes.  This look is very subtle yet elegant and can be worn during a date, a social event, or even at a night out on the town.  Wherever you go, your eyes will be dazzling with this look.


Tools for the trade:
Clinique concealer in 05 Medium Beige
bare Minerals foundation powder in Summer Bisque
NARS Smudge Proof Eyeshadow Base
Smashbox Brow Tech & Cream Eye Liner Palette
Ulta Eyeshadow Kit (cream eye shadow, strawberry pink, and dark pink)
Ulta liquid eye liner in Black
Smashbox Lash DNA mascara
Ardell Fashion Lashes Starter Kit
Victoria’s Secret Mosaic Blush in In Lust
Forever 21 glitter lip gloss in pearl pink


So first off, you want to start off with a clean and moisturized face.  Use concealer to hide dark circles and dark spots on your face.  Use a foundation powder to set the concealer.
Using an eyebrow pencil 2-3 shades lighter than your natural hair color (or if you have lighter hair, 2-3 shades darker) fill in your brows.  This will help to frame your eyes when you finish.  Now using a light cream eyeshadow, apply it to the inner corners of your eye.  Next, take a strawberry pink eyeshadow and apply to the middle of your eye.  Once this step is done, use a slightly dark pink eyeshadow and apply to the outer corner of your eye.  Blend the colors to remove any harsh lines.  I used the eyeshadows from this kit that I got from Christmas.  You can actually buy it from Ulta but you can use other eyeshadow kits and they work just as well.


Now take an eye liner brush with a black gel eye liner and gently line your eyes.  Darken the eye liner more with a liquid eye liner pen. Now this is optional: if you feel like you need more eyelashes, use false eye lashes from any drug store and apply directly to your eye lash line.  I used Ardell Fashion Lashes Starter Kit for this tutorial.  Once finished, curl your lashes and apply your favorite mascara.
Now take a light rosy pink blush and apply to the apples of your cheeks.  For your lips, I would recommend using a matte light pink lipstick, but if you are out on the town and you want just a hint of sparkle then use a pink lip gloss with a pinch of glitter in it.

So here is the finished look:


I hope you guys have enjoyed this tutorial.  Stay tuned for my next post!

Saturday, January 8, 2011

A New Year, A New Experience

Hello everyone!   My name is Sammy and I want to welcome you all to my health and beauty blog.  I am obsessed with trying out new ways to stay healthy and happy as well as testing out makeup looks, hairstyles, and products.  I know that there are already a lot of beauty and health blogs out there but I want to be able to share my tips and tricks to everyone so that they can feel beautiful on the inside and out.  I'm new to the whole blogging world so if you see that I make a mistake please feel free to tell me.  :)  So now that's out of the way I can't wait to share my my beauty tricks and tips with you all.  See you all in my next post!
Related Posts Plugin for WordPress, Blogger...